

Pi is going to become the first digital currency worldwide. Dr Nicolas Kokkalis the founder of the Pi network has announced that they will launch the mainnet after completing the KYC of most people. Those who have not completed their KYC have a few months to complete it.
If you are one of them, you have come to the right place. Here we will guide you on how you can complete Pi KYC without any mistakes or any kind of issues.
Contents
Pi KYC Verification Process
Let’s start verifying Pi network KYC without making any mistakes.
Step #1. Download the Pi Browser App
Go to the Play Store on Android or App Store on iPhone, then search for ‘Pi Browser’ the official app will appear in front of you. Tap on the application and click the install button to install the Pi browser app on your Phone.
Step #2. Visit Pi Browser
You need to connect the Pi browser app with your Pi mining app. So, open the Pi mining app and click on the three dots at the top left corner.
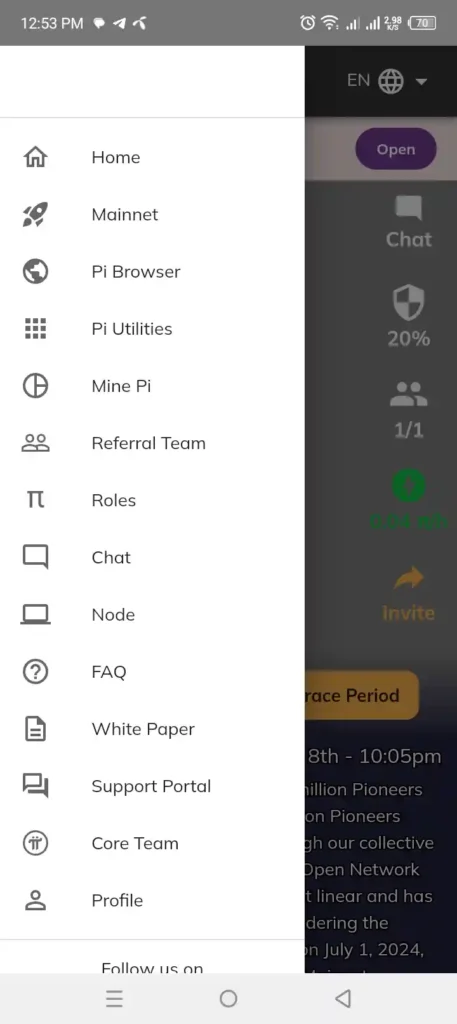
Now, click on the Pi browser, and next, click the ‘Sign in to Pi Browser’ button.
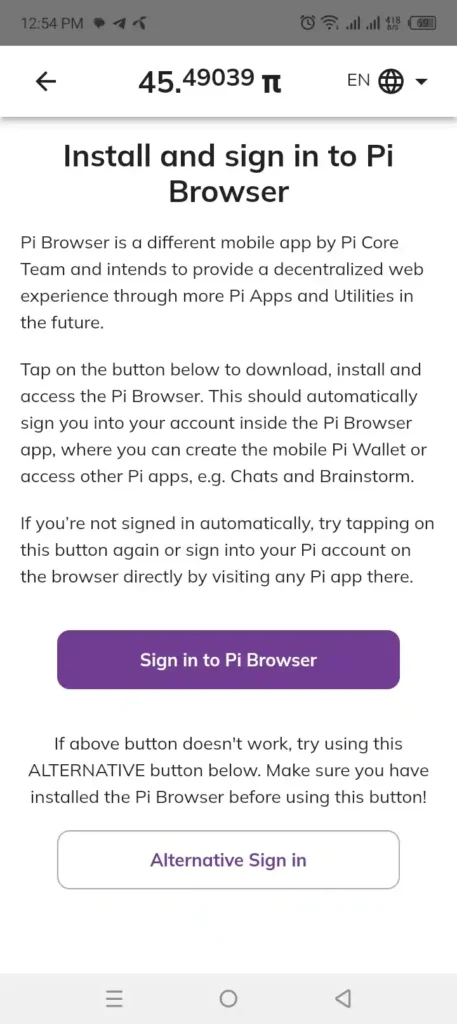
The Pi browser application will open and is already connected with your Pi mining application. Now you are in the Pi browser app.
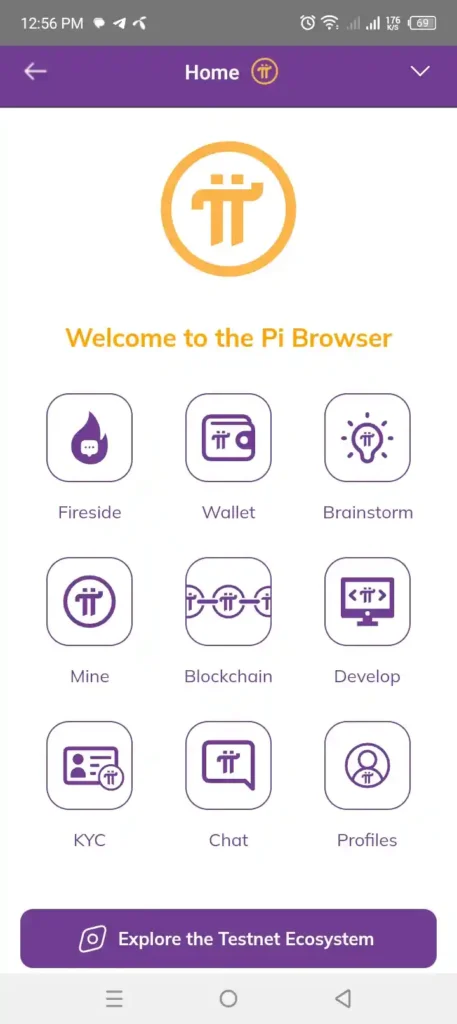
Click on the ‘KYC’ option and you will see a form asking about your language and country.
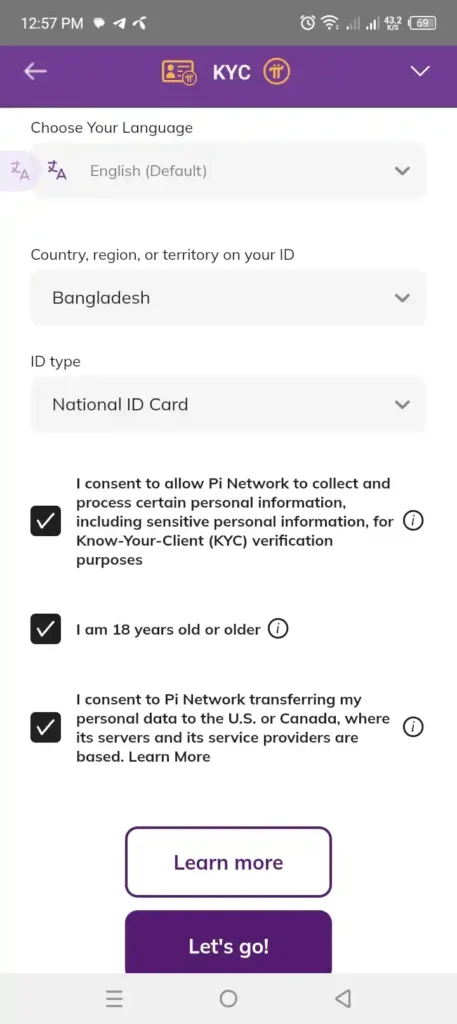
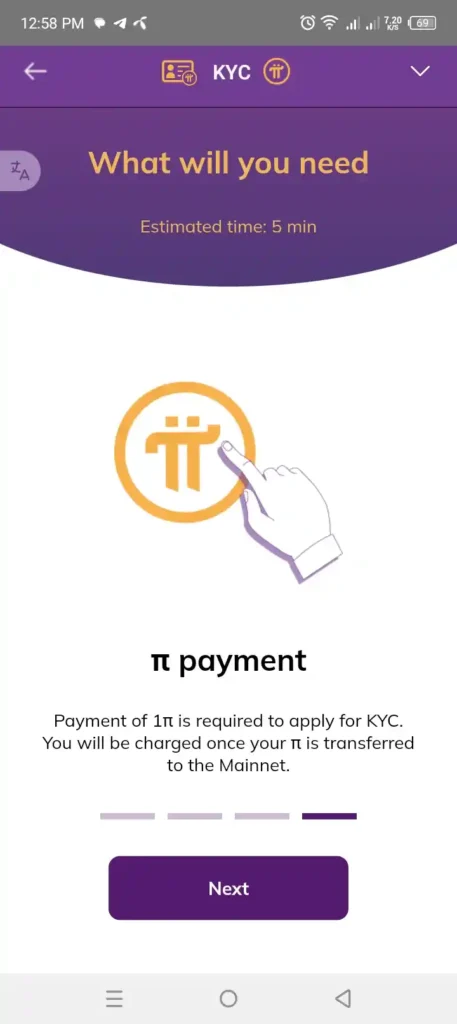
Now, Select your language (We prefer selecting English) country, and ID type. Then, mark all three check boxes below and click on the ‘Let’s go!’ button.
You will be charged 1Pi for your KYC verification process.
Step #3. Submit Verification Document
Click the ‘Next’ button and you will see a sample ID type that you selected earlier.
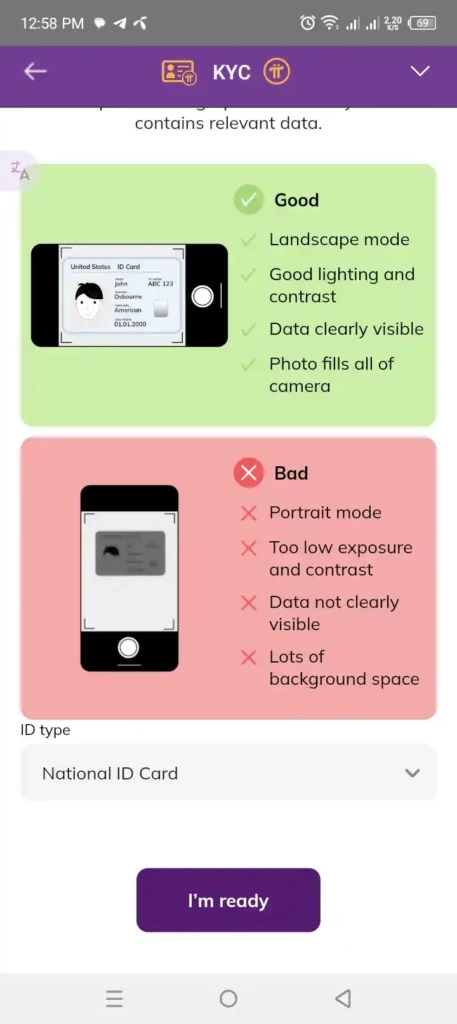
Click on the ‘I’m ready’ button. If you have selected National ID card then you will see the ‘Add Front photo’ option. Click on the button and your phone’s camera will open and capture your ID’s front photo. (Must be clear)
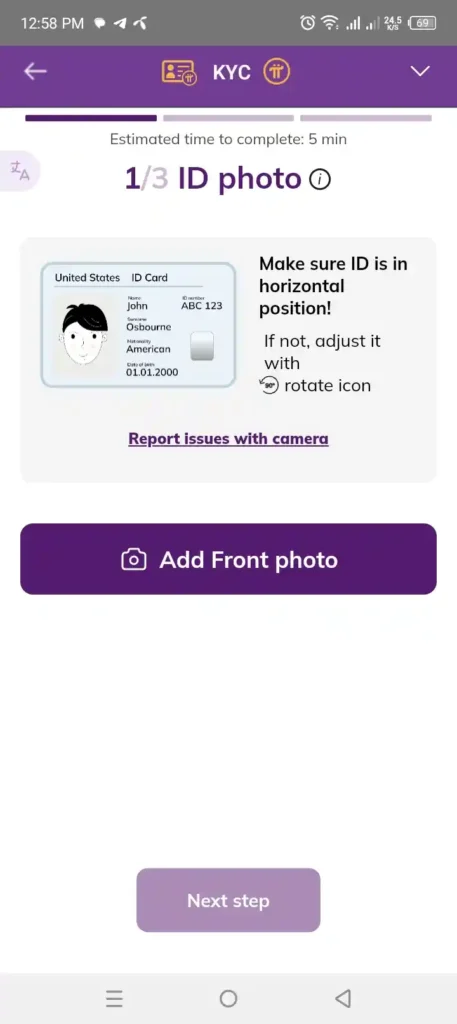
Then you will see another option to add the back photo of your National ID card. After you add both side photo, click the ‘Next step’ option.
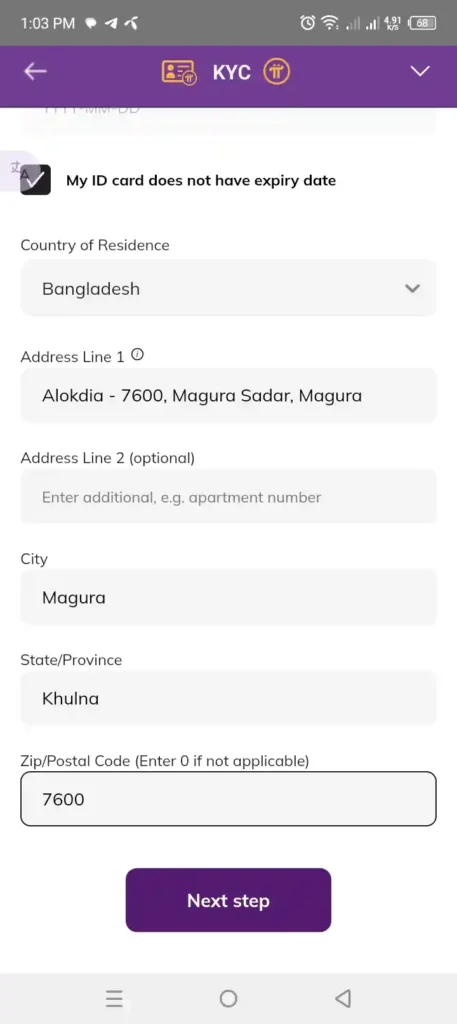
Step #4. Fill up the Form
Now, fill in all the information about yourself like first name, last name, address, city, etc. After you complete the form click on the ‘Next step’ button.
Step #5. Face Verification
Now you have to confirm your identity through a liveliness test or face verification. You will see an example before it starts.
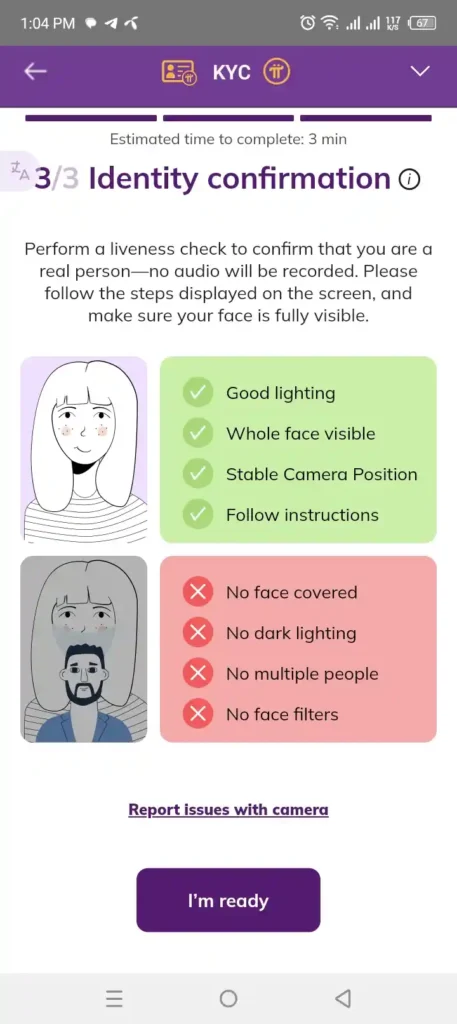
Click the ‘I’m ready’ when you are ready for face verification and complete the verification process.
Step #6. Recheck the Information
Lastly, you will be shown all your details to recheck all the information.
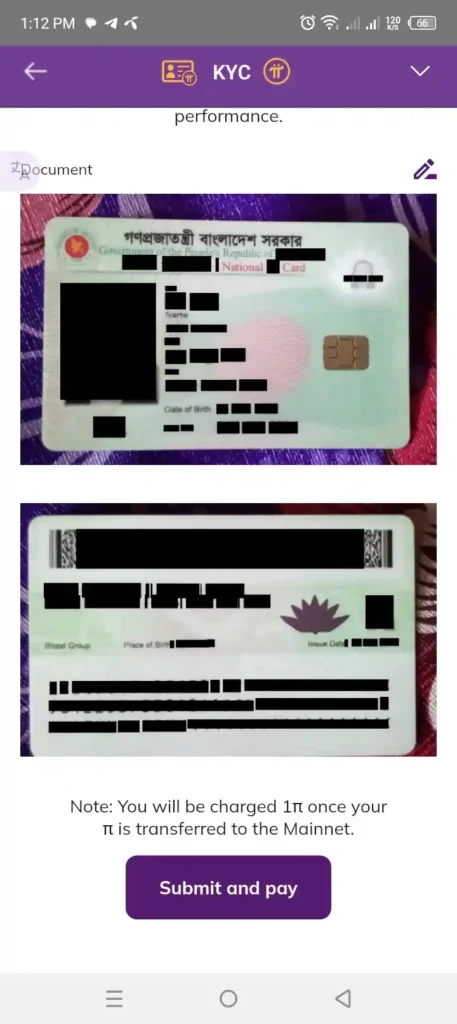
If everything is right then you can press the ‘Submit and pay’ button. Otherwise, you can edit any information if you see any mistake.
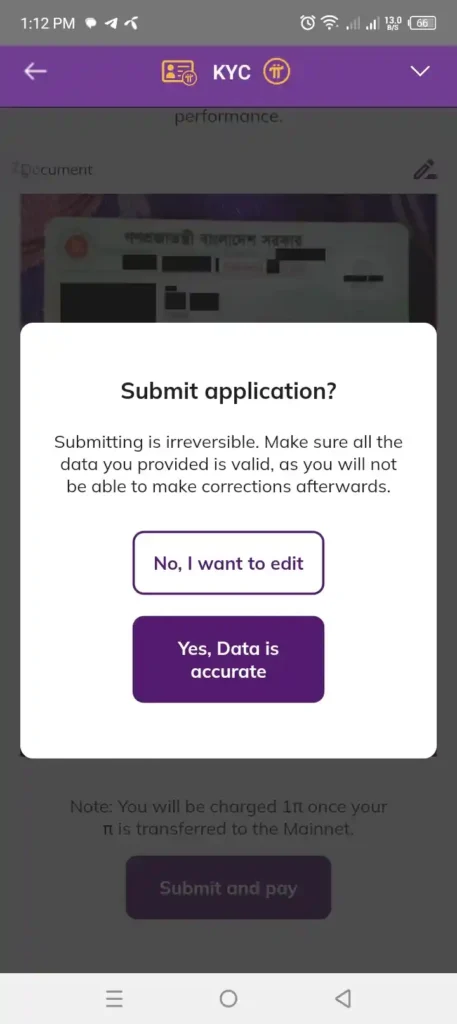
An alert will pop up in front of you before it is submitted. If the data is correct, then select the ‘Yes, Data is accurate’ button.
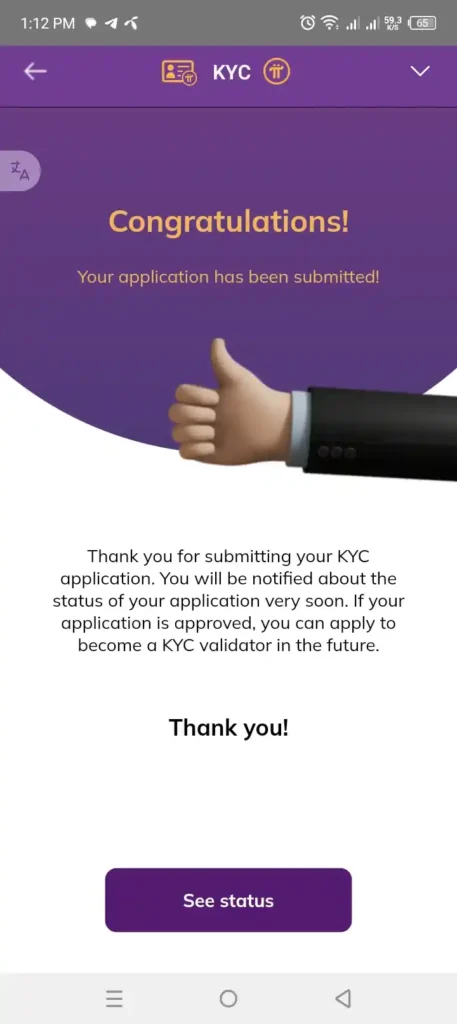
You are all set. The application is already submitted and if everything is correct then your application will be approved within a few hours. You can check the status inside the ‘KYC’ option in the Pi browser application.
Note: The KYC document name and the Pi mining app’s name must be the same, otherwise the KYC won’t be approved.
You can become a KYC validator after you have completed your KYC. You can read our article on how to become a Pi KYC validator here!
I am the founder of ListingDate.com, providing expert insights and updates on crypto mining and coin listings. Passionate about blockchain technology, I also aims to empower users with reliable and timely information for informed decision-making.